Virtualization is one of the best ways to bridge gaps between different operating systems. Earlier, if one had to try out a new operating system, they would generally have to make changes to their system like formatting and reinstalling the other OS. This, however, changed when virtualization came along. It allowed users to try out one operating system on top of another without making drastic changes to the system or without affecting the computer’s performance in any major way.
With virtualization, users could create virtual machines that allowed them to install Linux on top of Windows and vice versa. Nowadays, virtualization is one of the most booming sectors in the field of IT. So, if you are curious as to how to get started with virtualization, here is a quick how-to on creating virtual machines in Ubuntu using one of our favorite virtualization software VirtualBox.
Step 1: Install VirtualBoxTo install VirtualBox, open your Linux terminal (Ctrl + Alt + T) and type in or paste the following commands:
sudo apt-get install virtualboxThen, open the Launcher (Super key) and type in ‘Virtualbox’ without the quotes.
Step 2: Create new virtual machineThe Oracle VM VirtualBox Manager with a welcome message will appear. On the VirtualBox Manager top menu, click on the ‘New’ button.
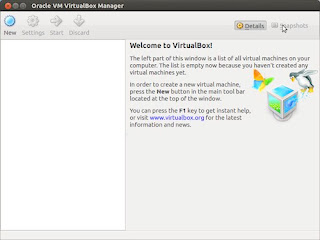 Step 3: Follow the wizard
A Virtual Machine Wizard will guide you through the entire process of installing a new virtual machine. Click on the ‘Next’ button.
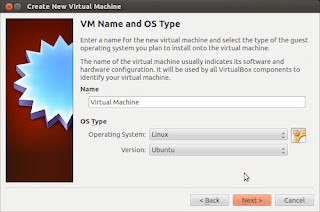
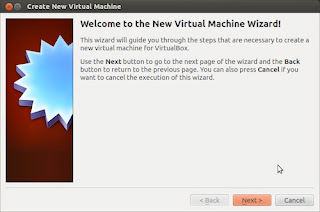 Step 4: Name your virtual machine and select OS type and version
Give a name to your virtual machine. You can call it whatever you want. Also, don’t forget to select the operating system you want to load on it. Here, in this case we have selected Ubuntu.
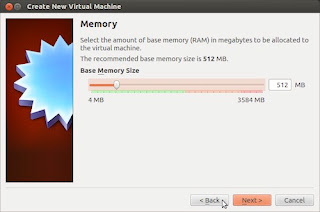
 Step 5: Allocate RAM
Then, select the amount of base memory you want to allocate. In other words, this is the amount of RAM your virtual machine will have while it is running. Depending upon the memory you have on your computer, you can allocate a small amount of it for the virtual machine but 512MB is recommended. We’d stick with 512 MB; however you can also go for higher numbers if you have a good amount of RAM.
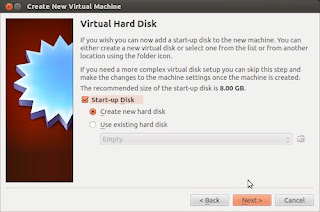
Step 6: Create virtual hard diskThen, create your virtual hard disk. This will be the amount of hard disk space your virtual machine will use while it’s running. It is here you’ll be storing all the operating system files and other stuff. In the virtual hard disk creation wizard, select the option that says ‘Create new disk’. VirtualBox automatically recommends you the space and other options so don’t worry, simply click 'Next'.
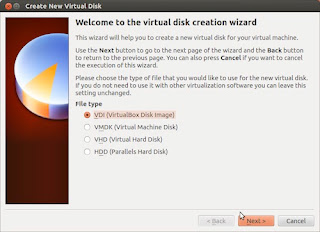
Keep the file type to VDI...
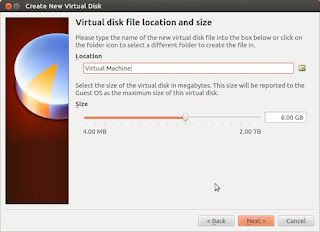
Choose the amount of hard disk space you want for your virtual machine. It’s always better to stick with the recommended options.
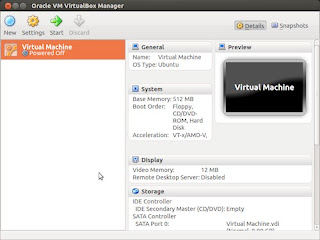
Et voila! You’re done. Just click on the ‘Start’ button to boot up your virtual machine and enjoy!
You may also check out our other handy articles about virtualization:
*
Virtualization Software For Ubuntu Linux*
How to Increase the Size of VirtualBox Virtual Machine Disk Image*
Running Windows with Linux: Virtualization or Dual Boot?*
How to Install Windows 7 on Ubuntu Using VirtualBoxWritten by: Abhishek, a regular TechSource contributor and a long-time FOSS advocate.


you all software engineers can send me lunix operating system books ,java books please send me on
ReplyDelete